Video Downsample Workflow (GUI)
This tutorial walks through Annolid's built-in Downsample / Rescale Video dialog for single videos and batch folders.
Use this workflow when you want to:
- reduce resolution and optional FPS for faster downstream processing,
- apply denoise and contrast adjustments,
- set one shared default for a folder,
- override only the few videos that need different settings,
- set a custom crop for a specific video when reviewing a folder,
- keep reproducible processing records (
metadata.csvand per-video.mdfiles).
Open the Tool
In the desktop app, open:
File->Downsample Video(s)…
The dialog has four tabs:
Input / OutputProcessingSummaryRun
This is the main dialog layout. The folder-review flow lives in the Processing tab and opens the sequential per-video override dialog from there.
Step 1: Choose Input and Output
In Input / Output:
- Click
Select Videofor one-file processing, orSelect Folderfor batch processing. - (Recommended) click
Select Folderunder Output Folder and choose a clean destination.
If output is left blank, Annolid automatically creates a sibling folder with _downsampled appended to the source folder name.
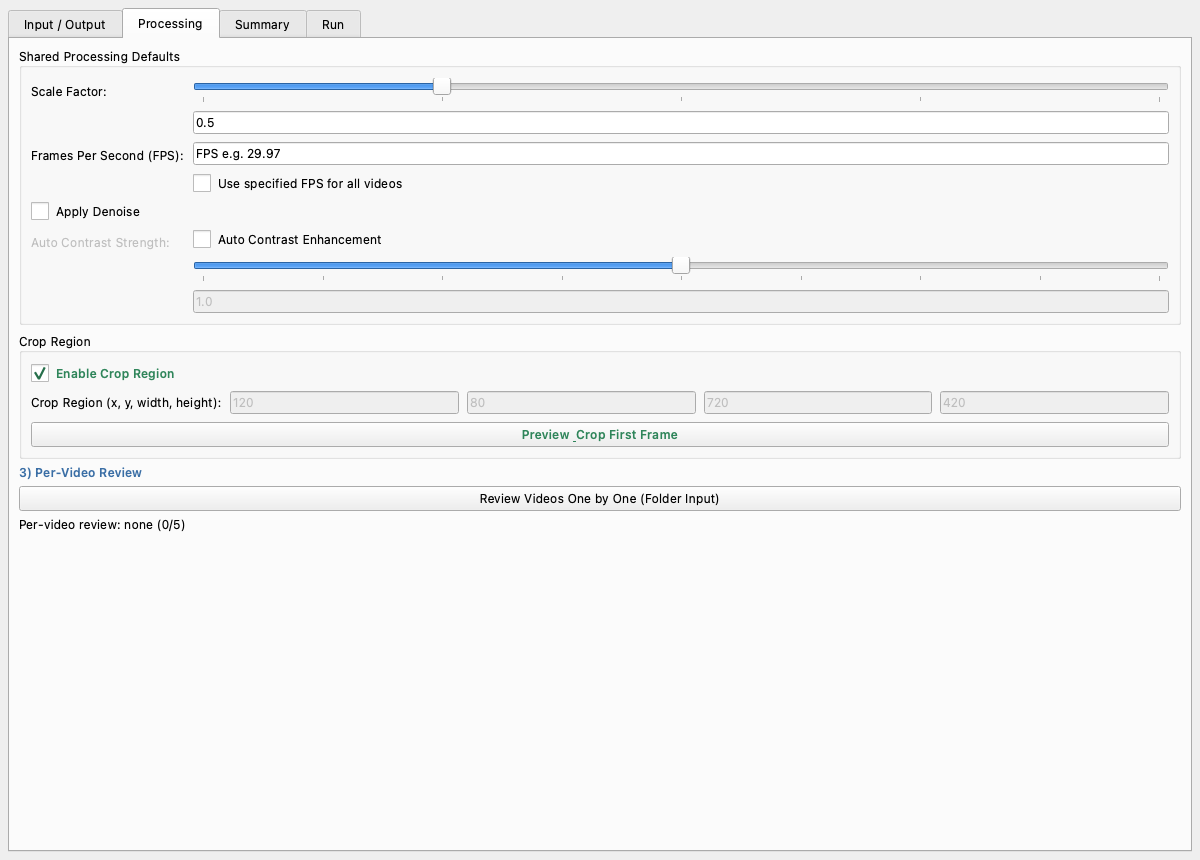
Step 2: Configure Shared Defaults
In Processing, set the baseline configuration for all videos:
- Scale Factor:
0.5halves width/height,0.25quarters them. - Use specified FPS for all videos: checked = force one FPS for all files; unchecked = keep source FPS per video.
- Apply Denoise: useful for noisy recordings.
- Auto Contrast Enhancement: enables brightness/contrast correction.
- Auto Contrast Strength: tune from
0.0to2.0(default1.0).
Crop Options
Use Crop Region as the default crop for the batch. If one video needs a different crop, you can override it later during folder review.
- Turn on
Enable Crop Region. - Set
x, y, width, heightmanually, or - Click
Preview & Crop First Frameto draw crop visually.
Step 3: (Folder Only) Review Videos One by One
If your input is a folder, you can apply per-video exceptions, including a different crop for a specific video.
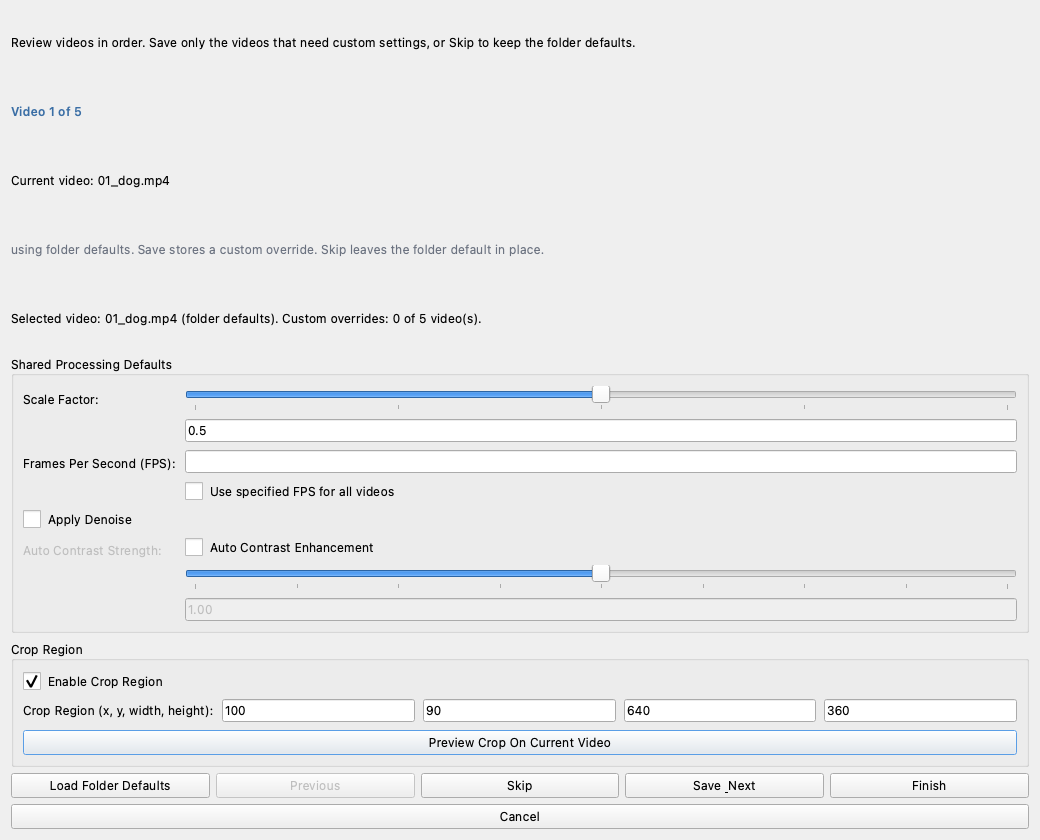
- Click
Review Videos One by One (Folder Input). - For each file:
- keep defaults with
Skip, - or set custom values, including a one-off crop, and click
Save & Next. - Use
Previousto revisit earlier files. - Use
Load Folder Defaultsto reset the current video back to shared settings. - Click
Finishwhen done.
Best practice: only save overrides for true exceptions. Keep the common case in shared defaults. If one recording was captured from a different camera angle, use the review dialog to give that video its own crop without changing the rest of the folder.
Step 4: Verify the Summary
Open Summary and confirm:
- input source and mode,
- output folder,
- default processing values,
- number of per-video overrides,
- run actions selected.
Use Refresh Summary after making changes.
Step 5: Run Processing
Open Run and select at least one action:
Rescale Video: re-encodes videos with current settings.Collect Metadata Only: writes metadata/report files without re-encoding.
Click Run Processing to start.
Output Artifacts
Annolid writes audit-friendly outputs in the target folder:
metadata.csvwith video metadata,- one
*.mdreport per processed/inspected video, - processed
*_fix.mp4videos whenRescale Videois enabled.
Per-video markdown reports include:
- effective downsample parameters,
- whether per-video review override was used,
- whether the override included a custom crop,
- FFmpeg command used (when re-encoding),
- resulting metadata.
Practical Presets
Preset A: CUTIE tracking speed copy
- Scale factor:
1.0for480 x 270source videos - Override FPS: on, FPS:
5 - Denoise: off unless the animals are hard to separate
- Auto contrast: off unless contrast is poor
- Crop: optional, only to remove unused space outside the cage
Use when tracking ordinary home-cage behavior where 5 FPS is enough temporal
resolution. Keep the original video unchanged and run CUTIE on the downsampled
copy. If the behavior is brief or fast, test a short segment at 30, 10, and
5 FPS before processing the full batch.
Preset B: Fast review copies
- Scale factor:
0.5 - Override FPS: on, FPS:
15 - Denoise: off
- Auto contrast: off
- Crop: off
Use when you want lightweight videos for annotation speed.
Preset C: Low-light behavior recordings
- Scale factor:
0.5 - Override FPS: off
- Denoise: on
- Auto contrast: on
- Strength:
1.1to1.3
Use for noisy, dim recordings where object visibility is poor.
Preset D: Arena-only crop batch
- Scale factor:
0.5 - Override FPS: off
- Denoise: optional
- Auto contrast: optional
- Crop: on (shared arena rectangle)
- Per-video review: only for camera-shift outliers
Use when most videos share a stable camera angle.
Preset E: One outlier video with a different crop
- Scale factor:
0.5 - Override FPS: off
- Denoise: optional
- Auto contrast: optional
- Shared crop: on for the main arena
- Per-video review: use a custom crop for the outlier video only
Use when a folder mostly shares one arena view, but a single file needs a tighter or shifted crop.
Troubleshooting
- "Run" does nothing: ensure at least one action is checked (
Rescale VideoorCollect Metadata Only). - Per-video review is disabled: it is available only for folder input mode.
- Custom crop not sticking for one file: open the per-video review dialog, set the crop for that video, and click
Save & NextorFinishbefore running the batch. - Crop not applied: confirm
Enable Crop Regionis checked and all crop values are valid integers with positive width/height. - FPS errors: if override is enabled, FPS must be numeric and > 0.
- Unexpected output location: check
Summaryto confirm the resolved output folder before running.